Address
Work Hours
Address
Work Hours
One of the biggest challenges people face when getting started with AI tools is not knowing how they fit together. This guide gives you a simple AI workflow for beginners that works with any toolset.
One of the biggest challenges people face when getting started with AI tools is not knowing how they fit together, which is why a simple AI workflow for beginners is essential.
This guide gives you a simple, easy-to-follow workflow that works with any toolset. It’s the same structure used throughout this site, and you can plug in whichever tools you prefer.
Before using AI, it helps to know what you’re trying to make.
People often begin with a workspace tool like Notion to:
This gives you a starting point so your workflow doesn’t feel scattered.
Tools like Jasper (or any alternative) help turn ideas into something you can work with.
You can use drafting tools to:
This gets you past the “blank page” stage quickly.
Once you have a draft, you can refine it using a tool that helps you organize your writing.
This step is often supported by:
The goal is to make the content easy to read and helpful.
Visuals help make your content feel complete.
People commonly use Canva (or another design tool) to make:
This step gives your content a finished feel.
Once your content is ready, you can:
Tools like GetResponse help with this part, especially for automating repeat messages.
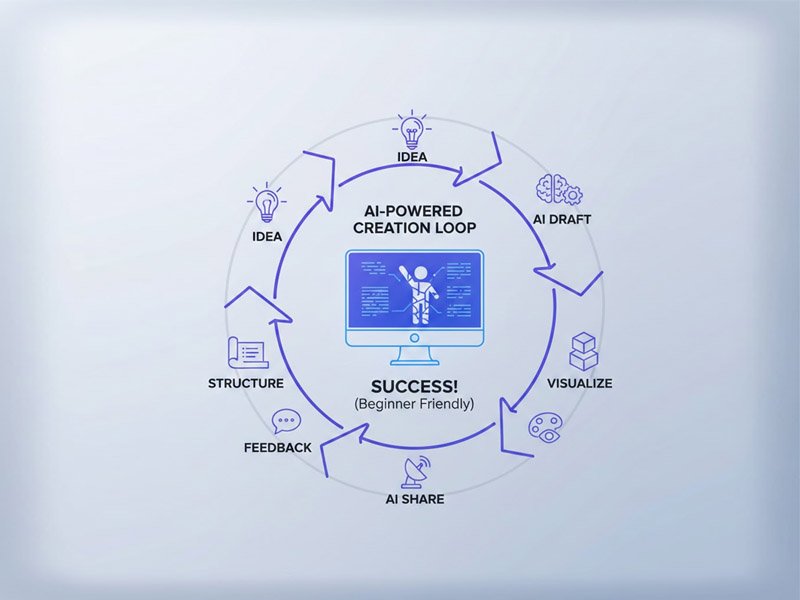
The more you follow the loop:
Idea → Draft → Structure → Visual → Share,
the easier it becomes.
Over time, you can:
This site will continue exploring more tools and workflows that support this process.
If you’re just starting out, the sheer number of AI tools can feel overwhelming. Without a clear path, you risk buying multiple subscriptions only to feel lost in a sea of features and possibilities. The beauty of this simple AI workflow for beginners is that it provides a consistent, repeatable structure. It allows you to focus on what you need to achieve—moving from idea to finished content—instead of which tool to click next. By following this 6-step loop, you treat each AI tool as a dedicated “assistant” for a specific phase, ensuring your work always progresses smoothly. This repeatable process is your foundation for building a reliable content machine, making the entire experience less chaotic and far more productive, regardless of whether you’re creating a short social post or a complete guide. The core consistency of the workflow is what leads to better results over time.
People get better results when they treat AI tools as “assistants” in each step rather than trying to automate everything at once.
The workflow is what creates consistency—tools simply support it.
Whether you use:
The process stays the same.
This flexibility is the foundation of everything we explore on this site.
Explore more tools and workflows → click here